The real meaning of warmth on the ice
Wind across open ice can cut through every layer you wear. When temperatures fall and visibility drops, your shelter becomes more than a comfort — it’s survival gear. A reliable ice fishing tent gives you steady warmth, a dry floor, and the calm focus you need when the lake turns harsh.
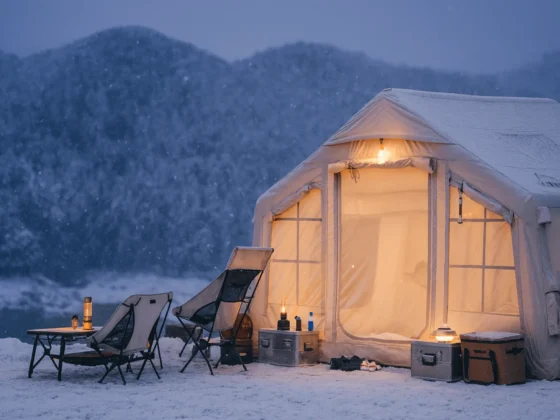
Modern insulated designs, especially those from RBM Outdoors, combine heavy-duty protection with fast setup. You get solid walls, real heat retention, and enough headroom to fish and rest comfortably for hours. For example, the ice fishing tent provides dependable insulation and space for both anglers and gear, making it ideal for multi-day trips.
Of course, warmth only matters when it’s safe. A proper heating setup — like a durable tent stove with heat-resistant glass — keeps the air dry and stable without the risk of open flames or toxic fumes. Together, the right tent and stove create a balanced micro-climate where you can fish, cook, and rest comfortably.
For smaller groups or compact setups, a 4 person tent strikes the right balance between warmth, mobility, and protection. It’s quick to pitch, easy to anchor, and strong enough to handle real winter wind. When every hour outside counts, the right shelter system turns the cold into just another part of the adventure.
Types of ice fishing shelters
Choosing the right structure depends on how you fish, how often you move, and how long you stay on the ice. Each style offers different strengths in space, setup time, and storm protection.
Hub shelters unfold like a pop-up, offering generous room and decent portability. They’re a popular middle ground — fast to set, stable with good anchors, and easy to heat. However, they rely on rigid poles and can be noisy in strong wind if not tensioned well.
Flip-over shelters are perfect for anglers who change spots often. Built onto sleds, they let you move from hole to hole in minutes. The trade-off is less interior space and limited standing height, but they shine for solo or short sessions.
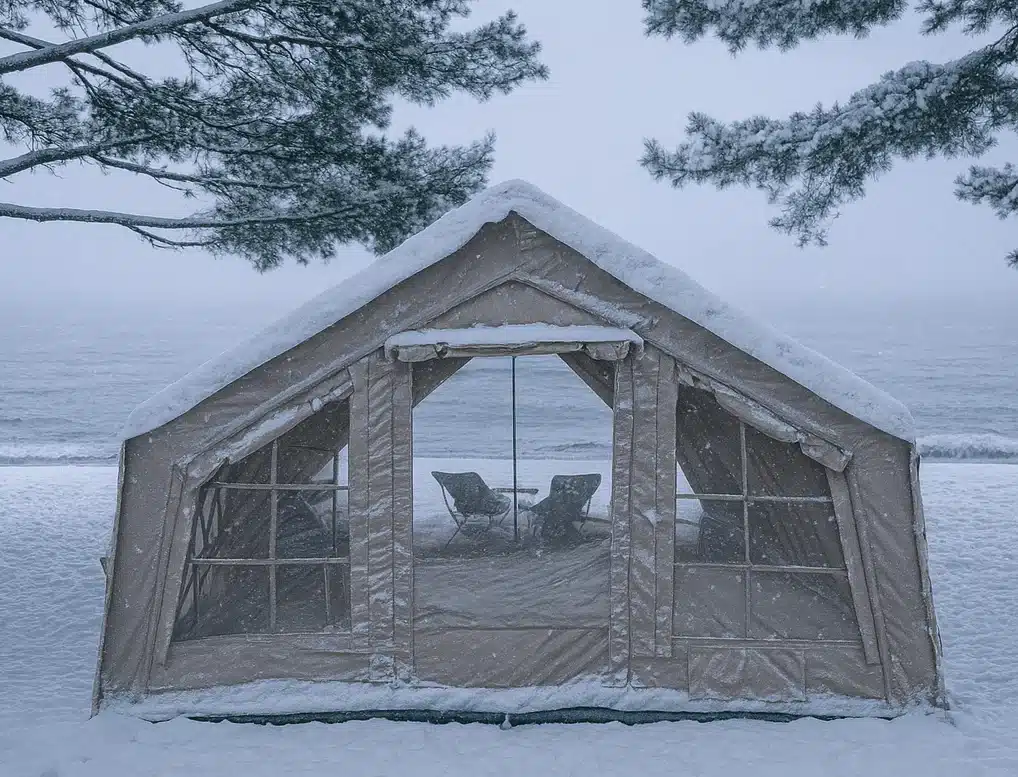
Hard-sided cabins are the warmest but least mobile. They’re built for stationary, multi-day setups and require transport by snowmobile or truck. Excellent for basecamps but impractical for long walks on the lake.
Inflatable tents, like those used in RBM Outdoors systems, combine quick setup with reliable insulation. Their air-beam frames absorb gusts instead of bending or cracking, and thick, layered walls trap heat efficiently. Inflatable shelters seal tightly against wind and snow, keeping temperatures stable even during long sessions.
When deciding, balance portability with comfort. For frequent travel, a flip-over works best; for longer stays, an insulated or inflatable model ensures warmth and endurance.
Warmth, airflow, and stove safety
Keeping warm on the ice is about control — not just piling on heat. A well-designed shelter works as a system: insulation keeps warmth in, while airflow keeps air clean and dry. Without proper ventilation, condensation and carbon monoxide can turn comfort into risk.
Start with safe stove placement. Set your heater on a stable, nonflammable surface with a heat shield or mat underneath. Keep at least a foot of space on every side and run the pipe straight up through the stove jack to ensure proper draft. For dependable performance, use a tent stove built with thick steel and heat-resistant glass — it radiates steady warmth while letting you monitor the flame.
Ventilation is equally critical. Keep one vent low for fresh air intake and another high for exhaust. Even when temperatures drop well below zero, a small crossflow of air prevents condensation and keeps oxygen levels safe. Never close both vents completely, especially overnight.
To maintain consistent heat, burn dry hardwood or clean compressed logs and add small batches frequently instead of one large load. A steady fire minimizes temperature swings and moisture buildup.
Safety gear should always be part of your packing list — a carbon monoxide detector, small fire extinguisher, and a pair of heatproof gloves. These simple items make long sessions inside an insulated ice fishing tent both comfortable and secure.
Proper airflow and a reliable stove don’t just keep you warm — they let you relax and fish longer without worry, even when the wind outside feels endless.
Insulation and build quality
A warm, quiet shelter starts with materials that trap heat and block wind without adding fussy maintenance. Look for a double-wall or quilted liner that creates a still-air gap; it evens interior temperature and reduces condensation on the ceiling. Removable liners are useful — drop weight for short, mild days and add insulation back when the lake turns severe.
Outer shells should be durable ripstop with a real hydrostatic rating and tight weave for wind resistance. In gusts, a tougher shell flutters less and conserves fuel. Reinforced seams at corners, door frames, and guy points stop small tears from spreading. Heavy-duty zippers with large pulls are easier to operate in gloves and resist icing; a fabric garage over the zipper cuts drafts.
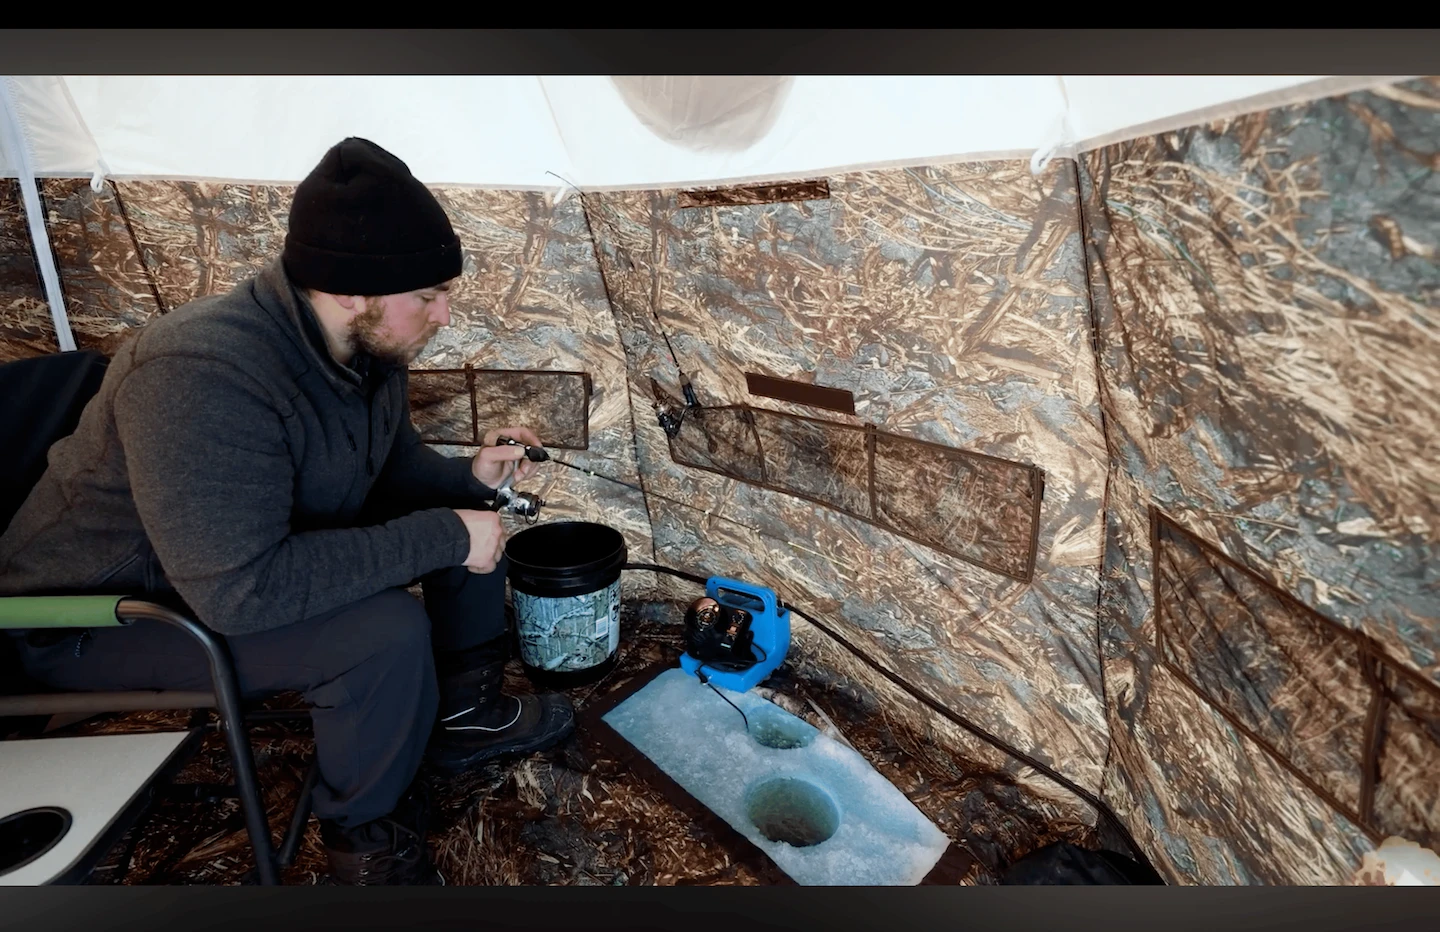
A wide snow skirt is the simplest draft stopper at ground level — pack snow onto it after anchoring. Choose the floor to match your style: no floor for fast hole-hopping, a removable floor for long sits, or modular tiles that drain around holes.
Finally, check heat-ready details: a purpose-built stove jack with heat-resistant fabric, interior heat shields with a small air gap, reflective guy lines you can see at night, and multiple tie-outs for tuning tension as the wind shifts.
Size and capacity for real trips
Capacity tags can be misleading once holes are drilled, a stove is running, and layers pile up. Choose a size for how you actually fish, not just headcount.
Plan around real movement
Keep a clear aisle from the door to the stove and holes so you can refuel, land fish, and exit without stepping over rods. Aim for roughly two feet of pass-through space; tight aisles cause crossed lines and cold drafts as people shuffle.
Solo and day sessions
For run-and-gun fishing, a compact shelter with standing height near the door is enough. Two holes offset in front of the chair, a small side table, and a dry mat by the entrance keep the layout efficient and the floor clean.
Two anglers, long sits
Look for an insulated footprint with opposing “lanes”: each angler gets a chair, two holes, and a gear pocket, separated by the center aisle. Peak height makes layering up and tending the stove faster and safer, especially when gloves stay on.
Small groups and overnights
Three to four anglers need parallel lanes on one side and sleeping pads on the other. Place the stove forward with a straight flue, reserve a heat-safe bubble around it, and run a drying line high along the ridge for gloves and socks. A removable floor panel around the hole area helps control slush while keeping sleeping space warm.
Stove clearances and hole spacing
Leave at least a forearm’s width between holes so lines don’t tangle when you pivot in a chair. Keep holes a safe distance from the stove to avoid icing from radiant heat and to maintain clean walking routes.
Headroom, packed size, and weight
Peak height isn’t just comfort—it’s safer handling of hot cookware and layered clothing. At the same time, check the packed length and carry system; balanced straps and a sled-ready bag matter when you’re crossing glare ice in wind. RBM Outdoors designs typically balance standing headroom with a compact roll so you can travel light without giving up warmth.
Choose the smallest shelter that preserves an uncluttered aisle, safe stove clearances, and enough headroom to work. That’s the setup that stays warm, organized, and quiet through a full day on hard water.
Setup, anchoring, and storage
Solid pitching starts before you touch the pump. Pick flat, clean ice away from pressure ridges and old holes; brush off loose snow so anchors bite instead of skating. Face a solid wall into the wind and keep the door downwind to limit spindrift.
Fast setup flow
- Lay out the footprint and clip on guy lines you’ll actually use.
- Inflate or erect to about 80% so you can square the base and align the stove jack.
- Finish inflation/extension, close doors and windows, then tension the fabric evenly.
- Anchor corners first, then side tie-outs, then roof tie-outs. Re-tension once the shelter warms.
Anchors that hold in real wind
- Screw-in ice anchors work best set at a slight leeward angle so the pull loads them deeper.
- On glare ice, drill a short pilot to prevent wandering.
- Double up windward corners for storms; in deep snow, bury a sideways “deadman” and pack snow over the line.
- Keep guy lines low and aligned with panel pull; add short shock-cord sections or tensioners to smooth gusts and protect zippers.
Skirt and airflow
Pack snow along the skirt to seal drafts but leave a narrow gap near your designated intake vent. That way you keep a steady oxygen feed when the stove is running and reduce condensation without chilling the interior.
Smart breakdown and drying
Knock off rime and packed snow before deflation. Crack vents and doors so warm, moist air escapes as the walls relax. At home, hang the shelter fully open in a dry, ventilated space until the fabric and liner feel crisp, not cool or tacky. Clear zippers gently—never force frozen teeth—and run a light dry lube once everything is warm.
Off-season storage
Store loose, cool, and out of sun. Over-compression creases coatings and flattens insulation. Keep the pump, anchors, repair kit, and stove accessories in the same bag so nothing goes missing on first ice. For inflatable models, coil hoses loosely and check valve gaskets; a thin film of valve-safe silicone keeps seals supple.
Dialed anchoring and disciplined care turn a warm tent into a quiet, steady base that lasts—trip after trip, through real winter weather.
Checklist before your next trip
- insulated shell with real wind and water protection
- dedicated stove jack, heat shield, and safe clearances
- low intake and high exhaust vents you can adjust in gloves
- carbon monoxide detector, extinguisher, and heat-resistant mat
- wide snow skirt, solid ice anchors, and reflective guy lines
- floor style that fits your fishing: no floor, removable floor, or tiles
- reinforced seams, heavy-duty zippers, and secure window/vent closures
- peak height for safe layering and stove tending
- pack size and carry system you can haul in winter boots
- repair kit on hand: patches, seam sealer, spare lines, zipper lube
A shelter that checks these boxes stays warm, quiet, and secure through shifting wind and deep cold. With a dialed setup—built on practical airflow, reliable heat, and durable materials—you’ll fish longer, rest better, and make winter conditions work for you.